Promises with lightning web components, Explained!!!

The standard definition for promise says that Promise is the object which can produce some value in the future. These objects are used in asynchronus calls, where we can not predict time to complete the transaction. Promise helps to perform actions based on the results of the asynchronous calls.

Promises Terminology

  • Fulfilled – Indicates that the action has completed without errors
  • Rejected – Indicates that the action has failed with errors
  • Pending – Indicates that the action still is in flight

Let see the syntax below

Promise Declaration – The function declared below returns a promise. For the understanding, lets put a sample timeout in the function body.

Function makeAsyncCall(msg){ 
return new Promise((resolve, reject) => {
      setTimeout(
        () => {
          console.log(msg);
          resolve();
        }, 
        1000);
    }) 
}

Promise Execution – While calling this function in the Javascript, we can call it using the below syntax. Then segment will execute when the promise is complete, and similarly catch function will execute in the action failure.

            makeAsyncCall('msg')
            .then(result => {
                console.log('This promise is resolved')
            })
            .catch(error => {
                console.log('This promise has failed')
            });

This is so simple, but yet so powerful. Let’s see some benefits of using Promises

Chaining of Events

            makeAsyncCall('msg')
            .then(result => {
                console.log('This promise is resolved')
                // Call a new promise in here
            })
            .catch(error => {
                console.log('This promise has failed')
            });

Then block refers to the successful action on the event, we can use the same block to call another promise function inside then block. Hence you can keep chain multiple actions using promises

Error Handling

As seen in the above example, we can associate catch block with a promise. Every time an action on a promise fails, execution goes the the catch block, and statements in the catch block are implemented. We usually use some error handling or showing error toast messages in the catch block

LWC – Radio with Checkboxes

What are we doing here ?

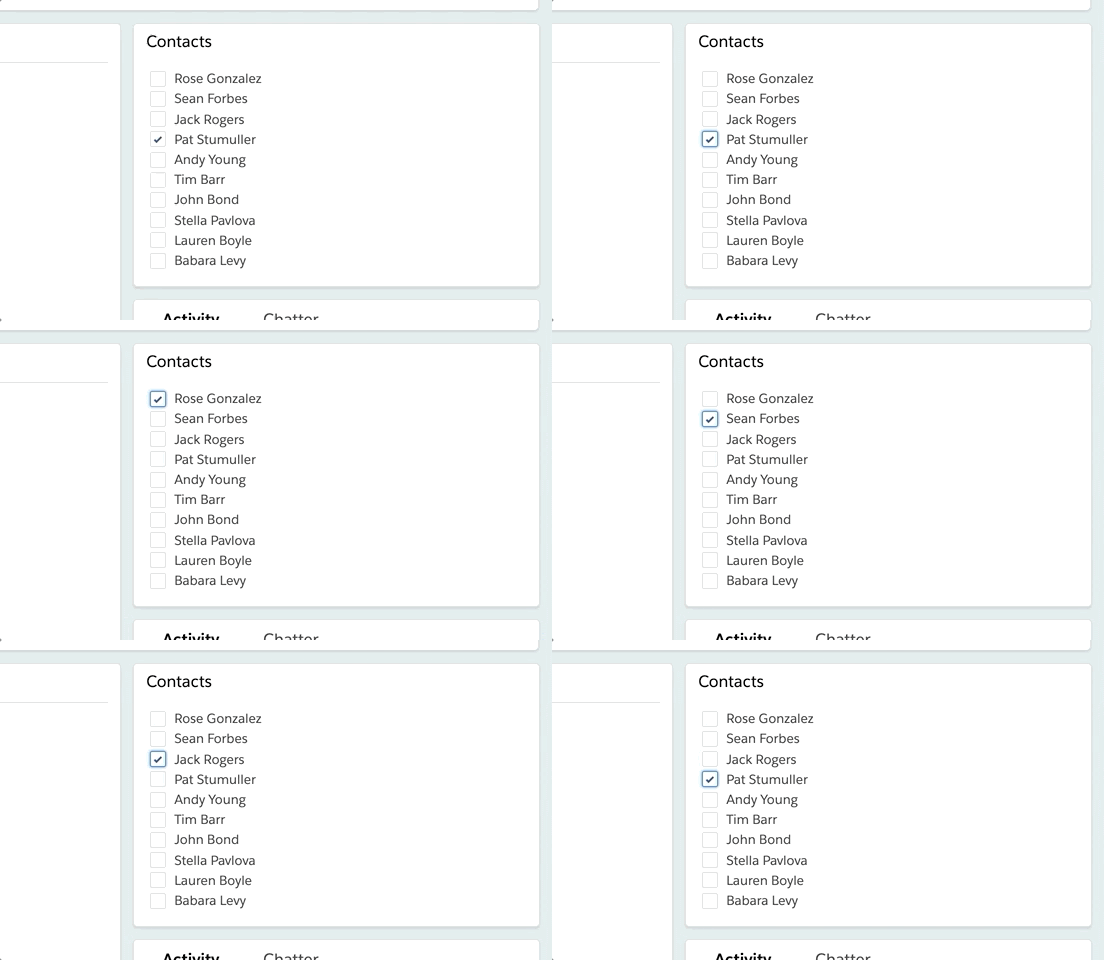
If you are new to Lightning Web Components (so is Salesforce by the way), and have come across a use case to implement radio options, where option set is rendered by dynamic values, there are very little options. Currently radioinput is supported by aura component but not by LWC. And thus we did a little trick here. Read the SF documentation

In the post below we will see how we can implement radio button functionality using the checkboxes.

What is the trick?

We all know the check boxes are multi select by default. However to make it behave as radio buttons, we created small javascript code to unselect all options and select the current option, thus at any moment there will be only one selection in the list

Enough talk, lets dive into the code. Also if you would like to fork/clone/whatever, here is the link to the github code

Radio.html

<template>
    <lightning-card title="Contacts">
        <div class="slds-m-around_medium">
            <template for:each={contacts.data} for:item="contact">
                <lightning-input 
                key={contact.Id} 
                label={contact.Name} 
                type="checkbox" 
                data-value={contact.Id} 
                onchange={handleChangeEvent}>
            </lightning-input>
            </template>
        </div>
    </lightning-card>
</template>

Simple HTML code, all it does is that I loops through the contacts array, iterates over in the lightinig input. Please note we have associated handleChangeEvent to our lightning input (or checkboxes)

Radio.js

import { LightningElement,wire } from 'lwc';
import getContactList from '@salesforce/apex/ContactController.getContactList';

export default class RadioWithCheckbox extends LightningElement {
    @wire(getContactList)
    contacts;
    handleChangeEvent(event){
        Array.from(this.template.querySelectorAll('lightning-input'))
        .forEach(element => {
            element.checked=false;
        });
        const checkbox = this.template.querySelector('lightning-input[data-value="'+event.target.dataset.value+'"]');
        checkbox.checked=true;
    }
}

Few things to note here

  • Contact list is populated using the apex controller
  • QueryselectorAll fetches all the lightning input and deselects them
  • Queryselector fetches the current lightning input based on the event value (we used contact id as the key to lightning-input), and mark the current lightning input as checked

I have full faith in your intelligence that you will not need meta file

Happy Coding Everyone, please drop in your suggestions below, I would love to discuss and ARGUE